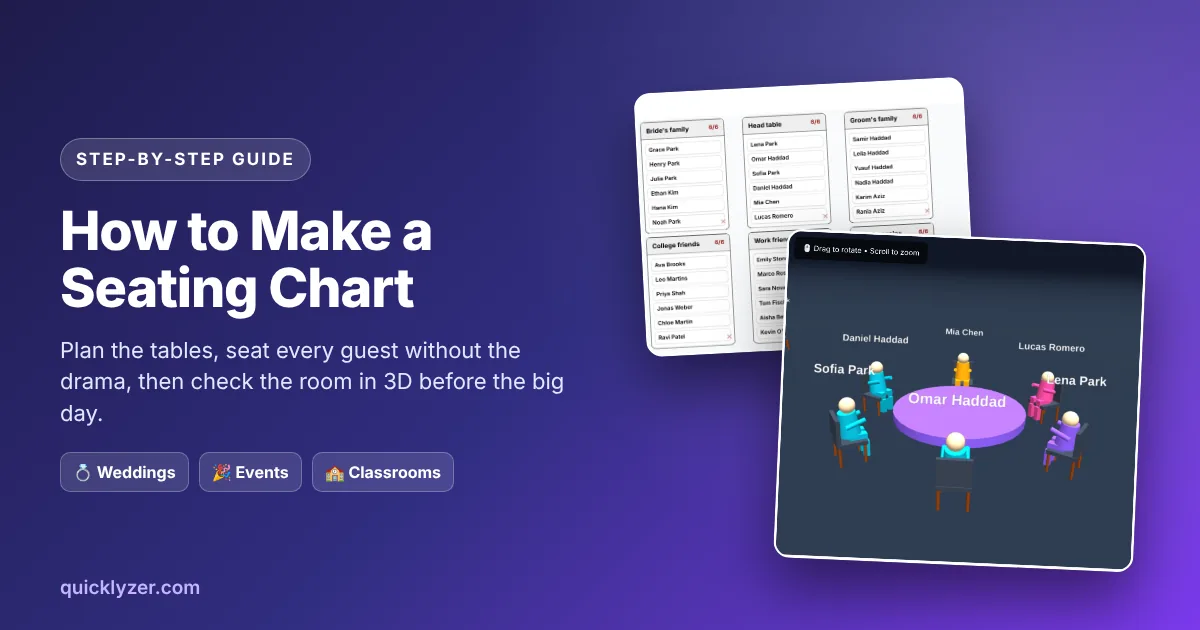
Drawing a seating chart takes ten minutes. Deciding who sits where takes much longer. You have to work around the divorced parents, the friend who knows nobody, the toddler who needs to sit near Mum and the grandfather who can’t hear a word near the speakers. A good chart deals with those people first and fills the easy seats last. Once that thinking is done, the drawing is quick.
This guide walks through the whole process with one real example: Lena and Omar’s dinner for 36 guests, built from a spreadsheet to a printed chart. Every screenshot comes from our free Seating Chart Maker, which runs in your browser. The method works the same for a birthday dinner, a company party or a classroom.
The 7 Steps at a Glance
- Lock the guest list once RSVPs are in, and import it in one go.
- Work out your tables: the size, the seats per table and how many you need.
- Sort guests into circles of people who already know each other.
- Seat the hardest guests first, in a fixed order of priority.
- Fill the remaining seats by dragging or tapping names onto tables.
- Walk the room in 3D to check sightlines, distances and gaps.
- Print the chart and plan for last-minute changes.
Before You Start: Four Things to Have Ready
- A confirmed headcount. A chart built on “maybe” guests gets rebuilt at least once.
- The venue’s table details. Ask what size the tables are, how many fit in the room and whether there is a long head table.
- A rough sketch of the room. Mark the entrance, the dance floor or stage, the speakers, the restrooms and the buffet or bar. These decide where your most important tables go.
- Two short lists: people who must sit together, such as couples, carers and a parent with a young child, and people who must not.
Step 1: Lock the Guest List After RSVPs Close
The most common reason a seating chart takes three evenings instead of one is starting too early. Joy’s wedding planning team advises waiting until RSVPs have closed, about three to four weeks before a wedding. Paperlust suggests having the chart final two to three weeks out, so the caterer and venue get the numbers on time. For a smaller event, wait for the reply deadline and chase the people who haven’t answered before you seat anyone.
Keep the list in a spreadsheet with one full name per row in the first column. You will probably have other columns for the side of the family, the meal choice or the address. That is fine, because only the first column is imported. Then click Import File in the tool and choose the .xlsx, .xls, .csv or .txt file, or paste the names into the box and press Paste List. The file is read inside your browser and never uploaded, so guest names stay on your computer.
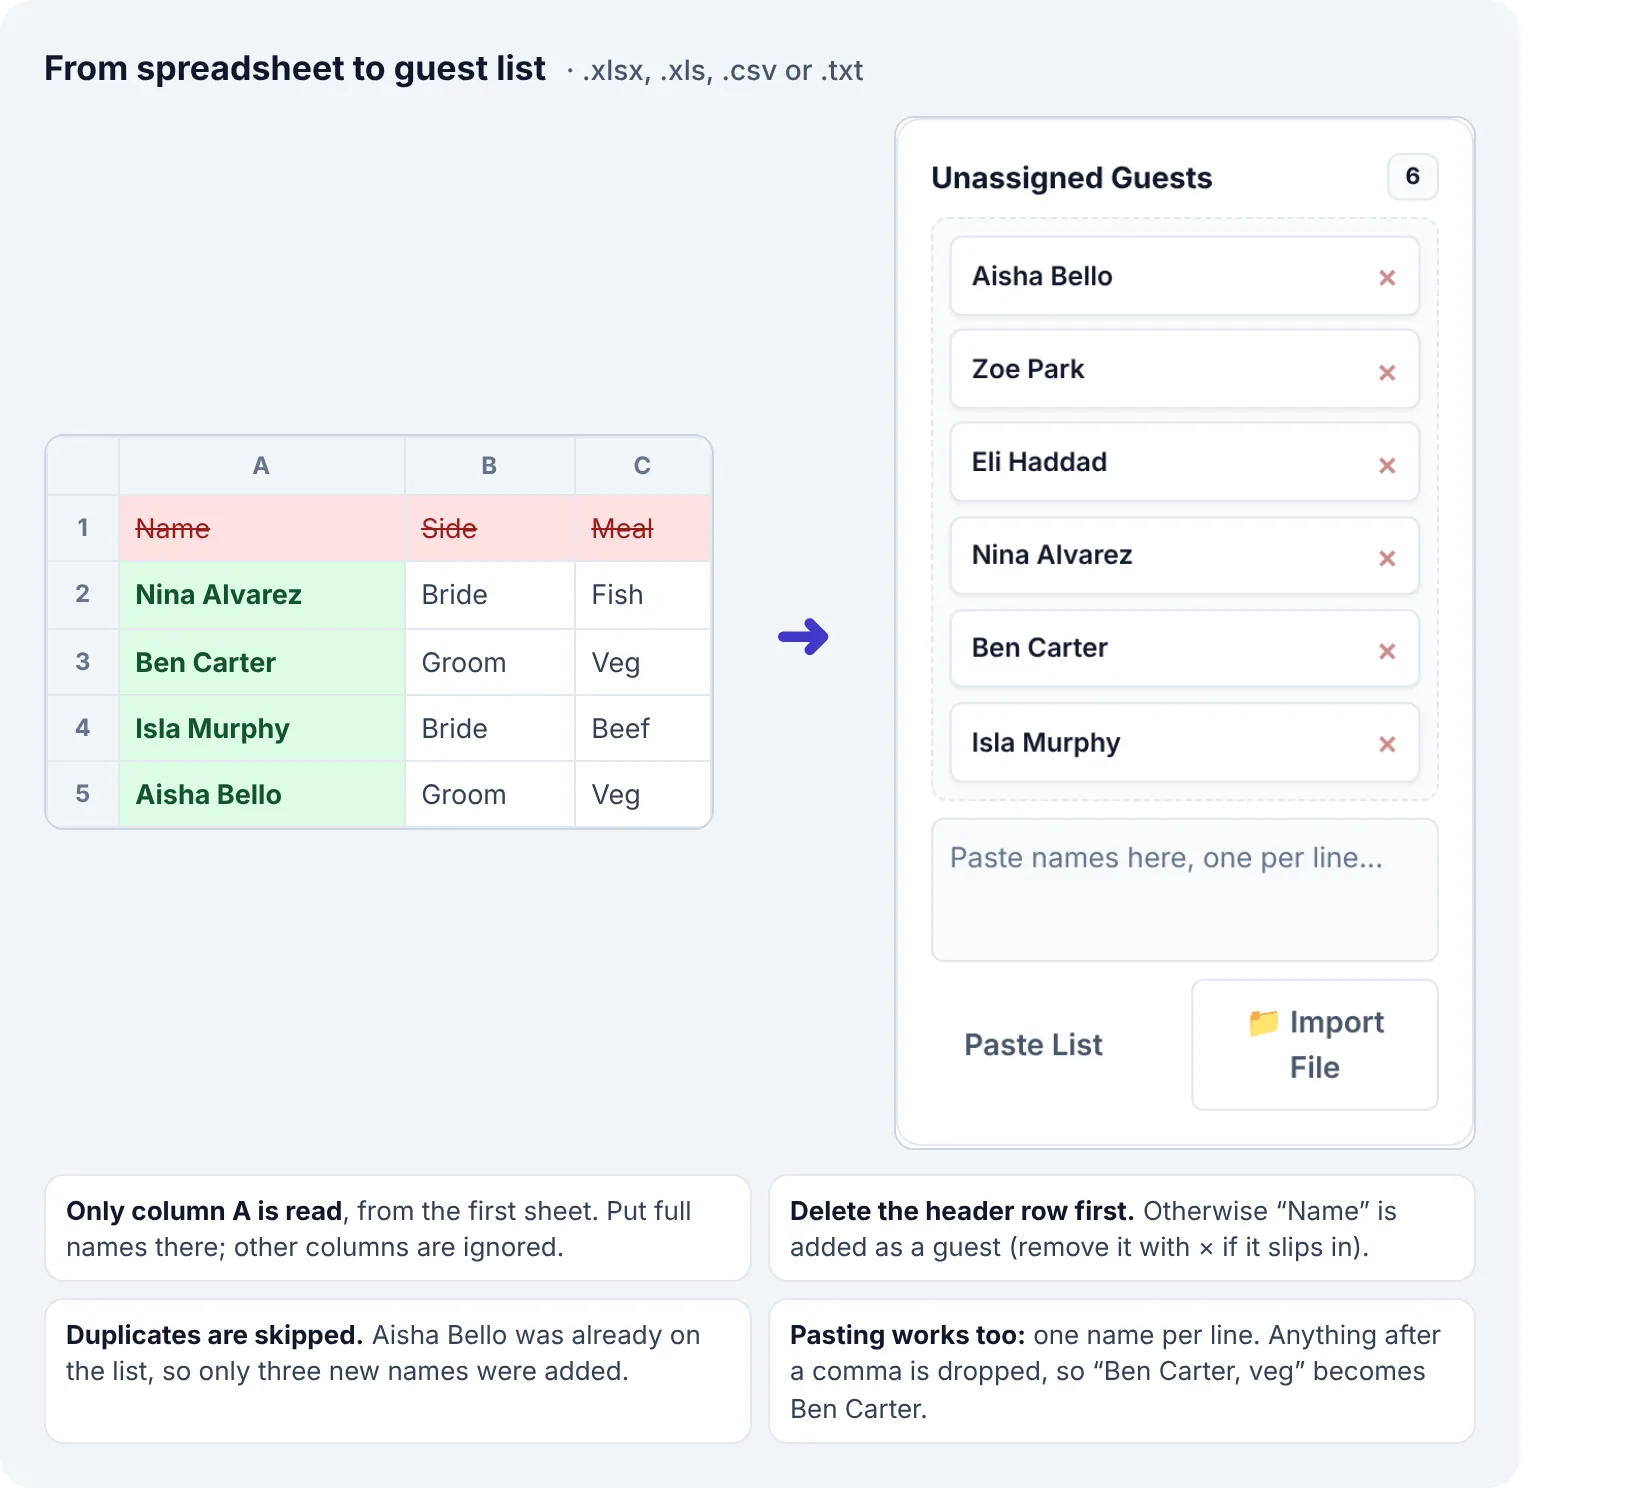
Four small details save a lot of cleanup:
- Delete the header row. Otherwise a guest called “Name” appears in your list. If it slips in, remove it with the × beside it.
- Write names as “First Last”. Everything after a comma is dropped, so “Carter, Ben” would come in as just “Carter”.
- Give every plus-one a unique label. Repeated names are treated as duplicates and skipped, without regard to capital letters. Ten rows of “Guest” become a single guest. Write “Ben Carter +1” or the partner’s real name instead.
- Merge lists once. If two people kept separate lists, you can import both. Anyone who appears on both is only added once.
Step 2: Choose Table Sizes and Work Out How Many You Need
Round tables are the standard at weddings and dinners because everyone can see and talk to everyone else. Rental companies quote two numbers for each size: a comfortable count and a maximum. The maximum means elbows touching and no room for a centrepiece.
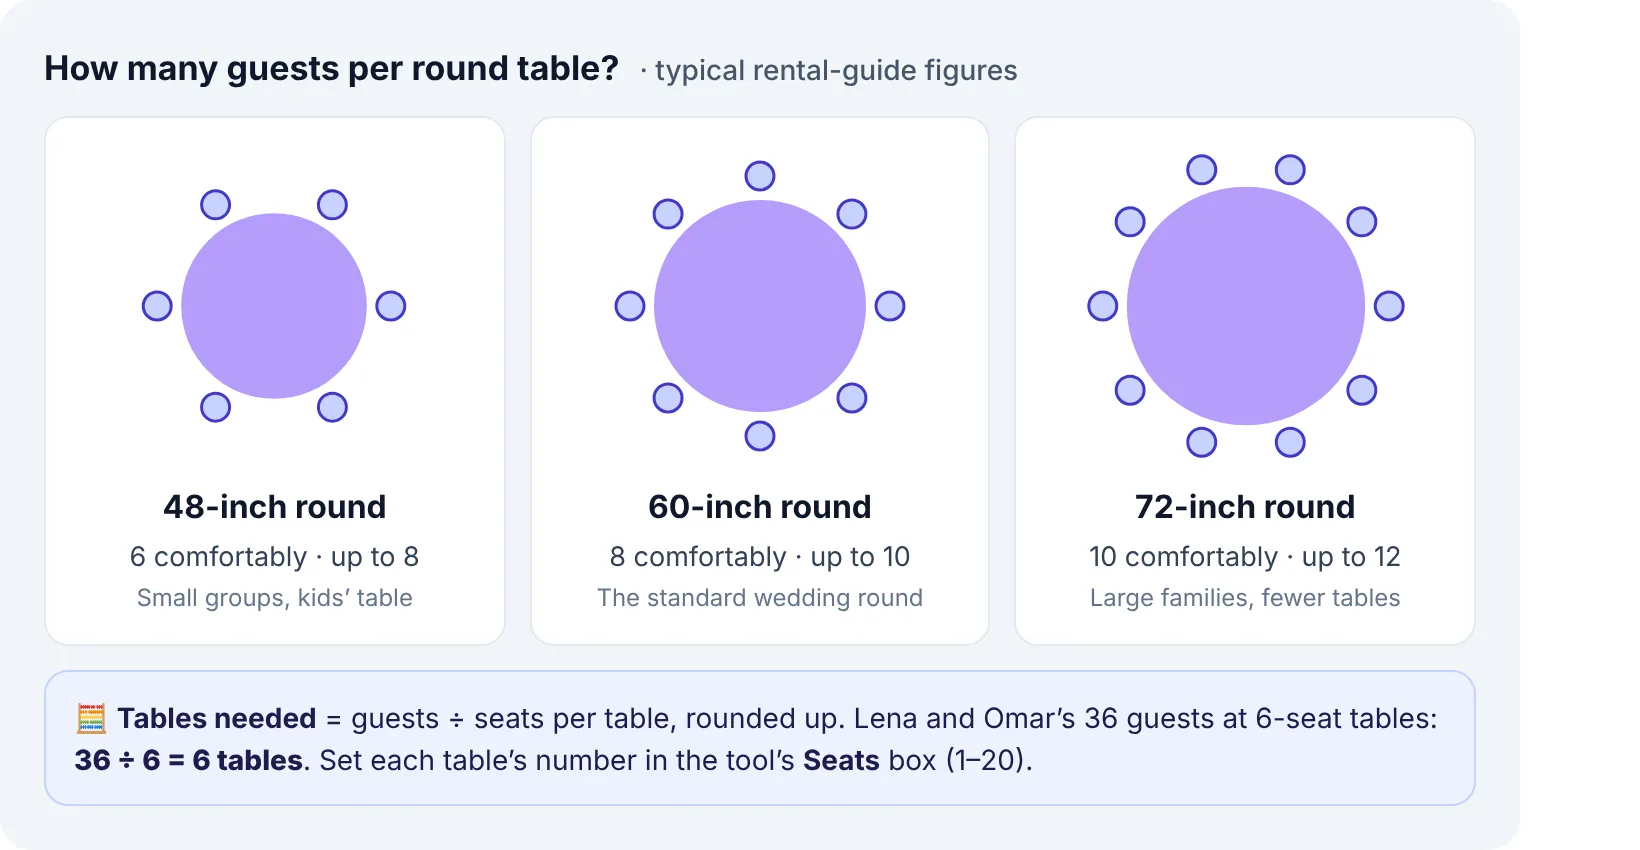
| Round table | Comfortable | Maximum | Good for |
|---|---|---|---|
| 48 in (122 cm) | 6 | 8 | Small rooms, a kids’ table, couples who want a quieter table |
| 60 in (152 cm) | 8 | 10 | The usual wedding and banquet round |
| 72 in (183 cm) | 10 | 12 | Large families and fewer tables in a big room |
To get the table count, divide the guests by the seats per table and round up. Lena and Omar have 36 guests and chose 6-seat tables, so 36 ÷ 6 = 6 tables. With 38 guests the answer would be 6.3, which means 7 tables. That leaves a few empty chairs, and that is a good thing: it gives you somewhere to put a late RSVP without breaking up a full table.
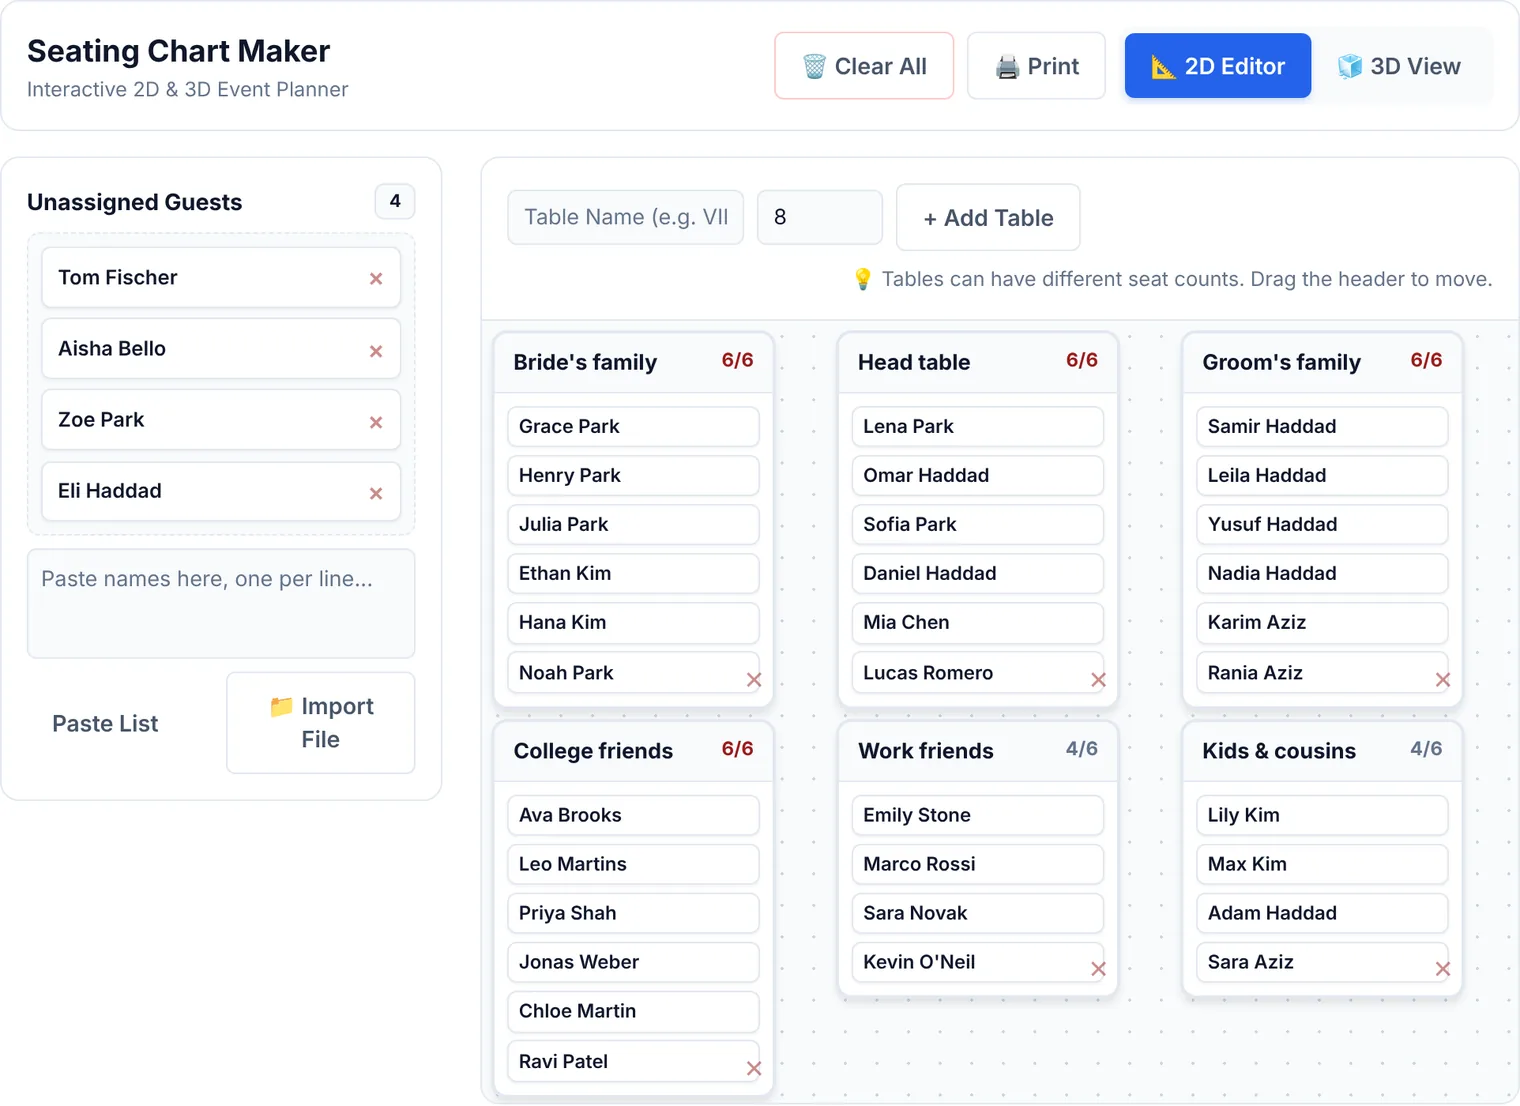
In the Seating Chart Maker, type a table name, set the Seats box (any number from 1 to 20) and click + Add Table. Every table can have a different seat count, so a 10-seat family table and a 4-seat table for the band can sit side by side. Name tables after the group that will sit there, such as “College friends” rather than “Table 4”. Group names make the next steps much easier to follow. New tables appear near the top-left corner, so drag each one by its header to roughly where it stands in the real room.
Step 3: Sort Guests into Circles Before You Seat Anyone
Don’t start by placing people at tables. Start by grouping them: who already knows whom? Most guest lists break into a handful of circles, such as each side of the family, school or college friends, colleagues, neighbours and children. Write each circle down with its headcount. Once the numbers sit next to your table size, the plan often becomes obvious.
Lena and Omar’s 36 guests fell into six circles of six:
| Circle | Who | Guests |
|---|---|---|
| Head table | The couple, their siblings and closest friends | 6 |
| Bride’s family | Parents, grandparents, aunt and uncle | 6 |
| Groom’s family | Parents, grandparents, aunt and uncle | 6 |
| College friends | A group that has stayed close since university | 6 |
| Work friends | Colleagues from both of their offices | 6 |
| Kids & cousins | Children and teenage cousins | 6 |
Real lists are rarely this tidy. Circles of 9 won’t split evenly into tables of 6, and some people belong to no circle at all. Mix two small circles that share something, such as neighbours and old school friends who live in the same town. Seat a lone guest next to the most outgoing person at a table, never between two strangers who already know everyone else.
Step 4: Seat Your Anchors First
Some guests are fixed points: where they sit is decided by role, family or need. Other guests are flexible. Placing the fixed points first stops you from painting yourself into a corner. Otherwise, at 11 pm you find the only free seat for Grandma is next to the speaker stack.
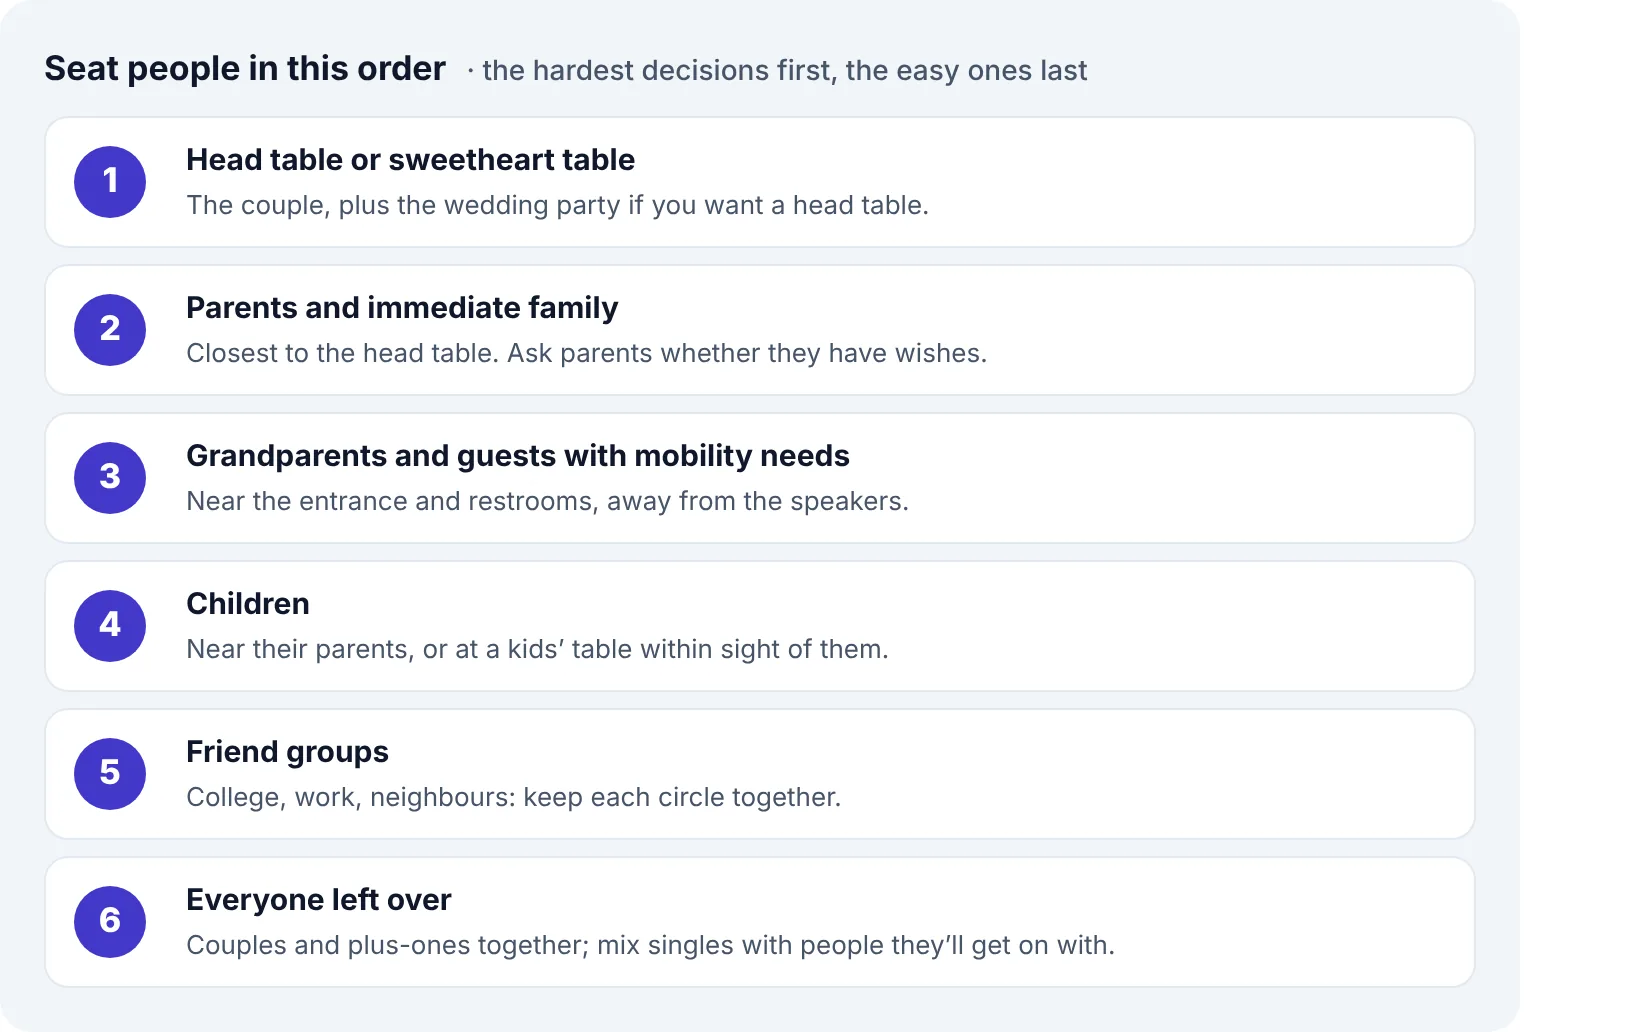
- Head table or sweetheart table. It sets the focal point of the room, so place it first, with a clear view from every other table.
- Parents and immediate family go closest to the head table. If parents are divorced, give each of them their own family table at a similar distance rather than making them share.
- Grandparents and guests with mobility needs go near the entrance and the restrooms, with a short route to their chair, and away from the speakers.
- Children sit with their parents, or at a kids’ table the parents can see.
- Friend groups fill the middle of the room, as whole circles where you can.
- Everyone else. Keep couples and plus-ones together, and put single guests at a table with at least one person they know.
Step 5: Fill the Tables by Dragging or Tapping
Now the work is mostly mechanical. Every imported name waits in the Unassigned Guests list, and the number beside the heading tells you how many are left. On a computer, drag a name onto a table. Each table shows a counter such as 4/6, which turns red when the table is full. If you drop someone on a full table, you get a “Table is full!” warning instead of a seventh chair.
On a phone or tablet, dragging a name across the screen usually doesn’t work, so the tool has a two-tap shortcut instead:
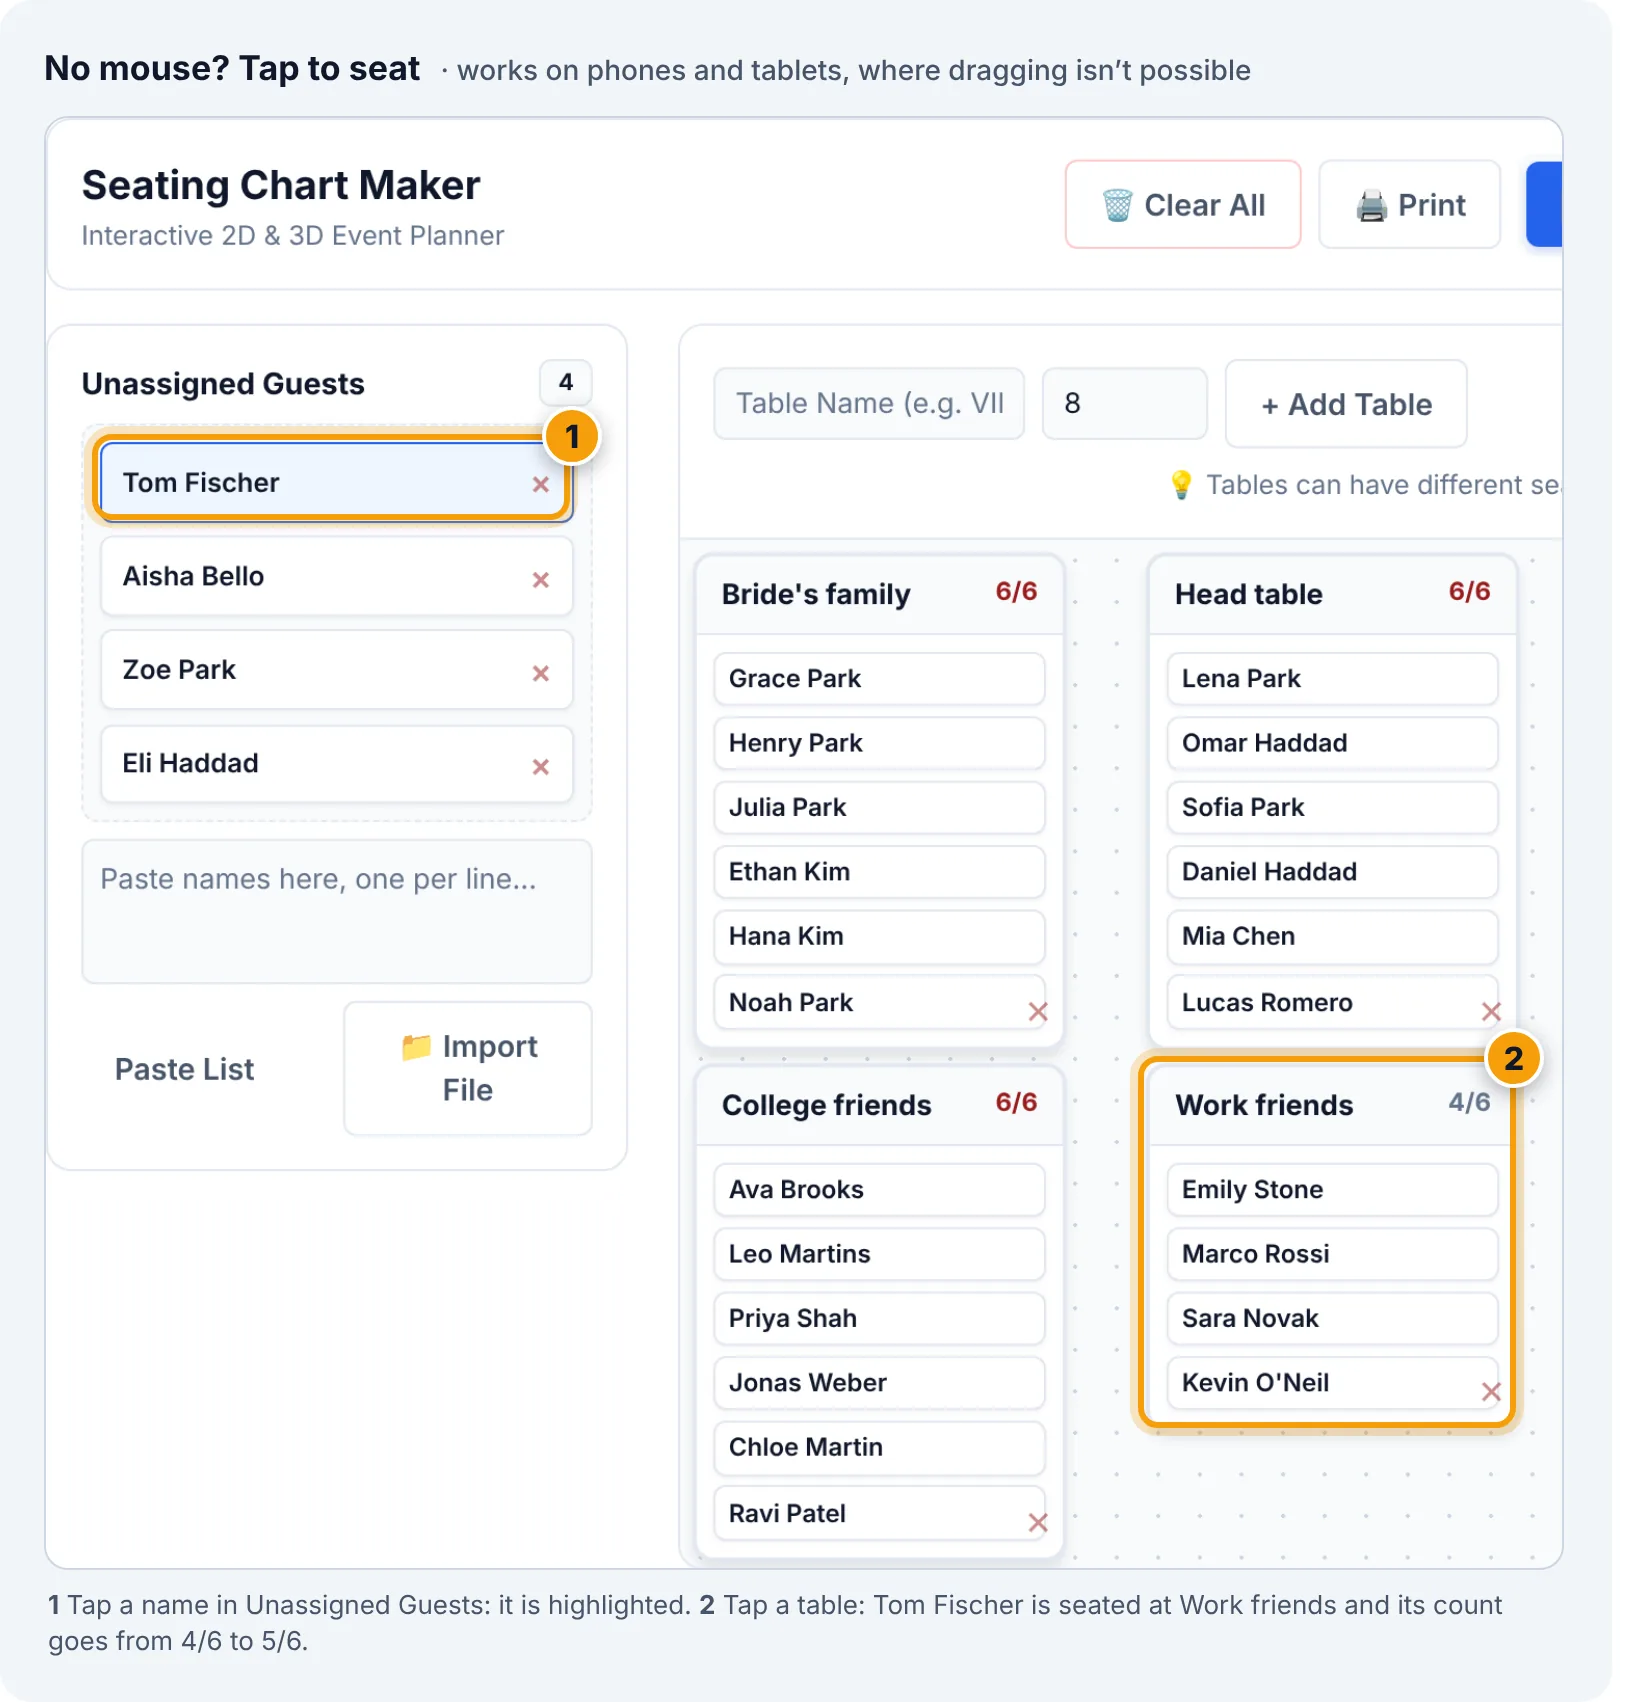
Tap the body of the table, not its header. The header is the handle for moving the table around the room.
Three more controls matter while you shuffle people around:
- Tap a seated name on a table to send that guest back to Unassigned Guests.
- The × beside an unassigned name deletes the guest from the list completely. Use it for people who have declined, not for moving someone.
- The ✕ at the bottom of a table deletes the table after you confirm. Its guests are not lost: they go back to Unassigned Guests.
Lena and Omar’s last four guests were the easy kind. Tom and Aisha, whose RSVPs came in late, joined the work friends, and two young cousins joined the kids’ table. When the list says All seated, everyone has a table.
Step 6: Walk the Room in 3D
A flat plan shows who sits at which table. It doesn’t show what the evening will look like from a chair. Click 3D View, and every table appears as a round table with its chairs and a seated figure for each guest, named above their seat. Drag to rotate the room and scroll to zoom. On a touch screen, use one finger to rotate and pinch to zoom.
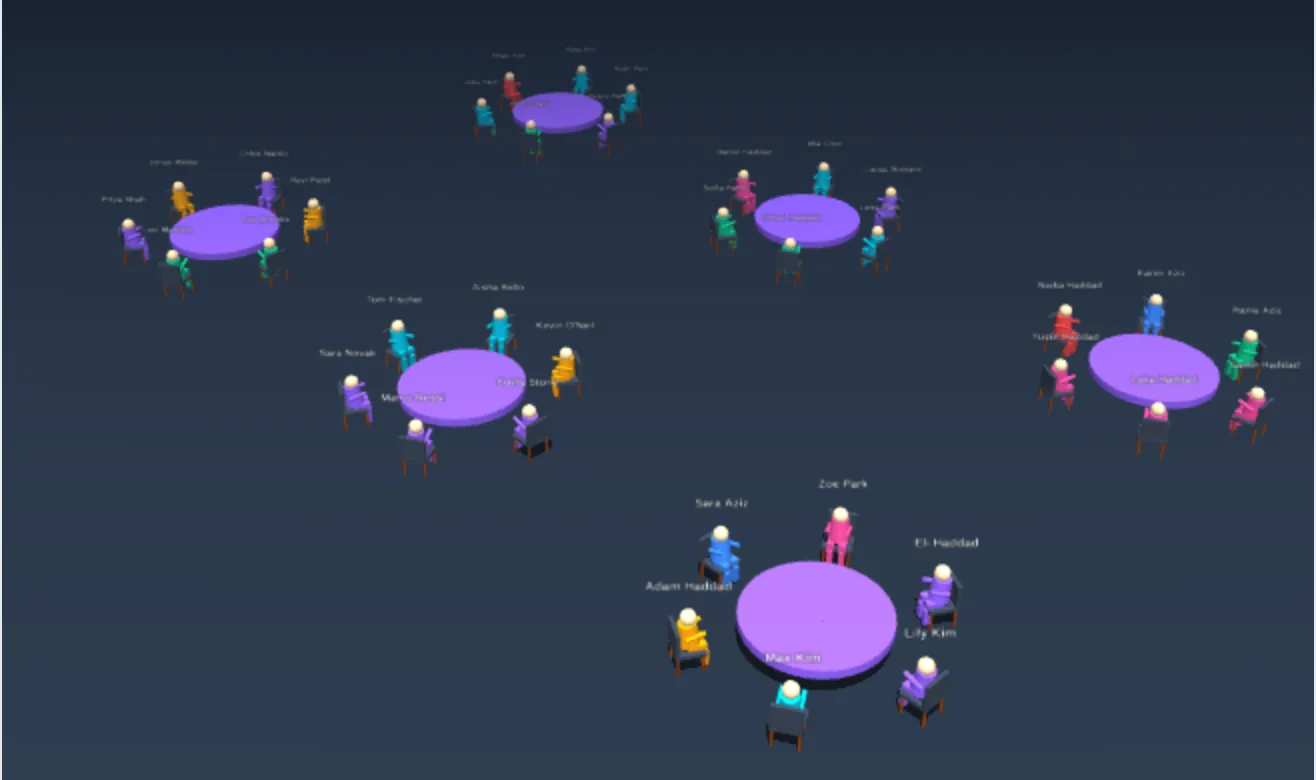
Use the 3D view to look for problems that are easy to miss on paper:
- Sightlines: can every table see the head table, or does a family table have its back to the speeches?
- Distances: is the kids’ table close to their parents? Is Grandma’s table near the door?
- Gaps: half-empty tables look worse in a room than on a list. Merge two of them if you can.
- Walkways: do waiting staff have a route between the tables?
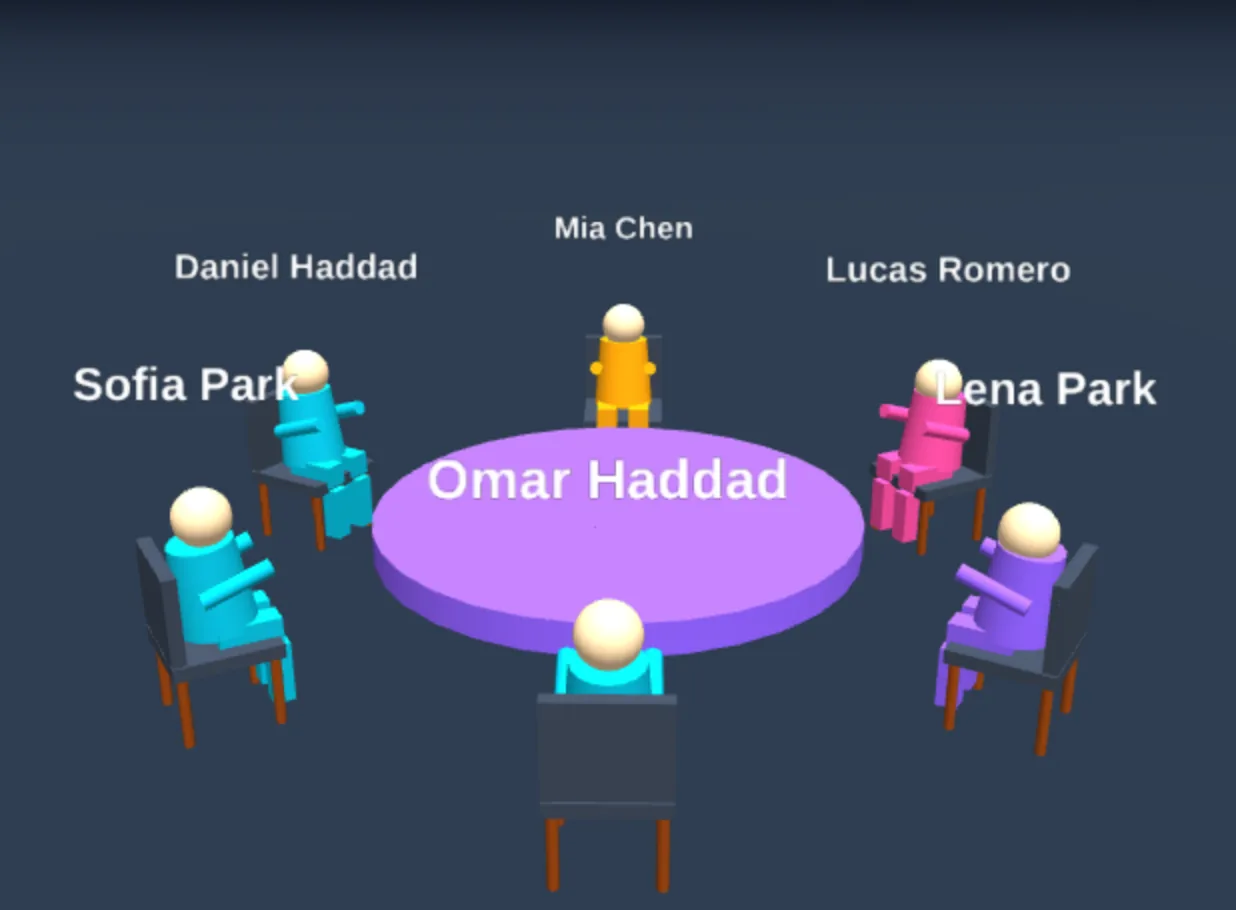
The 3D view draws every table round, even if your venue uses long tables. It also shows tables, not individual seat numbers. If you need place cards for exact chairs, choose the order around each table separately. The usual approach is to alternate couples and mix the talkers with the quiet guests.
Step 7: Print It and Plan for Last-Minute Changes
Switch back to the 2D Editor and click Print. Only the table layout is printed. Buttons, the sidebar and the unassigned list are left out, so check that the list says “All seated” first. In the print dialog, choose Save as PDF to get a file you can email to the venue, caterer or planner. Six tables in three columns fit on one A4 page in portrait. If your tables spread wider than the page, switch to landscape so the tables on the right aren’t cut off.
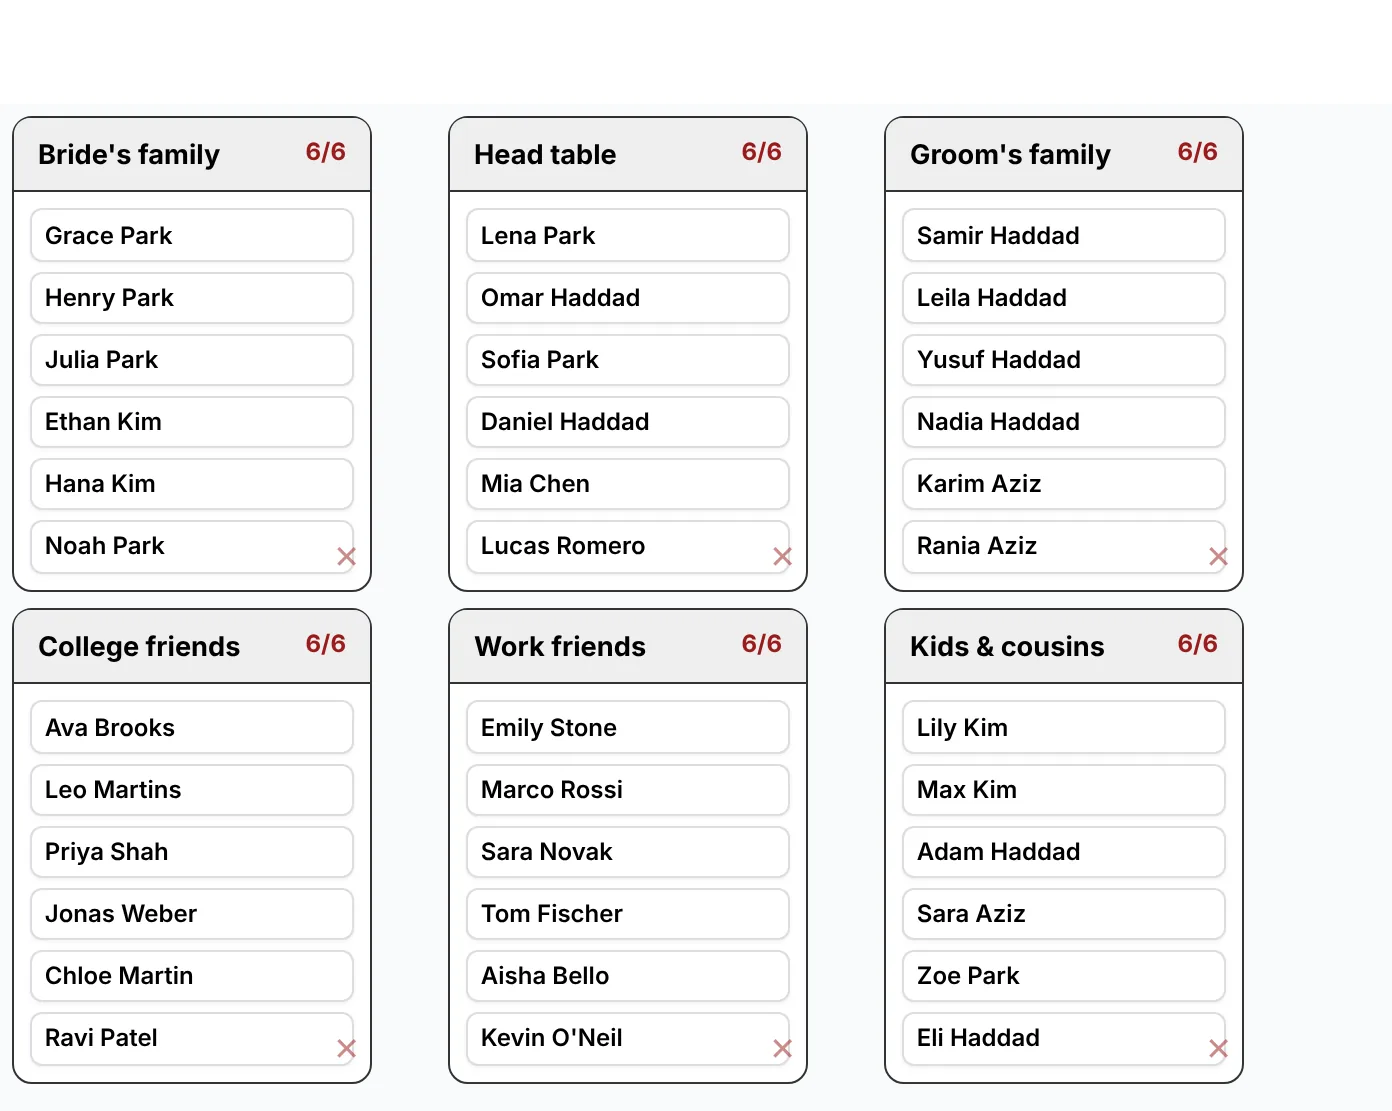
Something will change after you print: a guest drops out the week before or a plus-one appears. A few habits keep that painless:
- Your chart is saved in this browser automatically. Come back on the same device and browser and it is still there. A private window, a different browser or clearing site data will not have it.
- Keep the guest list file. It is your backup, and you can re-import it in seconds if you ever start over.
- Be careful with Clear All. It removes every table and every guest, and it cannot be undone.
- Keep one or two seats spare at tables where a late guest would fit naturally.
- Send the final PDF to the venue and caterer the moment it is final, and print the welcome-board version last.
Seating Strategies for Different Events
Weddings
A wedding has the most fixed points: the couple, both families, the wedding party and often more than one generation. Follow the priority order from Step 4 strictly. A sweetheart table for just the couple frees the wedding party to sit with their partners, which many guests prefer. Put the children of guests on a kids’ table only if a parent can see it.
Corporate dinners and parties
Here the goal is usually the opposite of a wedding: you want people to meet. Mix departments on purpose, but give every table one host who knows everyone and can start conversations. Keep senior speakers and guests of honour where the whole room can see them. Tables of 8 to 10 keep the room lively without splitting everyone into pairs.
Classrooms
For a class, each “table” in the tool can be a desk group or a row. Create “Row 1” with 6 seats, or “Group A” with 4. A 2008 review of classroom seating studies by Wannarka and Ruhl found that pupils stayed on task better in rows during individual work, and that disruptive pupils benefited most. Groups or semicircles suited discussion work better. One study in that review found pupils asked more questions in a semicircle. The practical rule is to let the task decide the layout. Many teachers print two plans, one for tests and one for group work.
Seating Chart Mistakes to Avoid
- Starting before RSVPs close. Every early draft gets redone.
- Filling every table to the maximum. Use the comfortable count, so plates, glasses and elbows fit.
- Isolating one guest. One person at a table of strangers who all know each other is the classic seating-chart regret.
- Forgetting the room. A table that looks central on paper may sit right next to the kitchen door or a speaker.
- Splitting couples and plus-ones to make the numbers work. Change the table sizes instead.
- Not telling the venue. Caterers need the final count and any table changes, not just the chart on the day.
- Printing too early. Print the display version last, after the final RSVP chase.
Frequently Asked Questions
How do I make a seating chart from an Excel guest list?
Put one full name per row in column A of the first sheet and delete the header row. Then use Import File in the Seating Chart Maker. Other columns, such as meal choices, are ignored, and duplicate names are skipped. CSV and plain text files work the same way.
How many guests should sit at each table?
Use the comfortable figure for your table size: about 6 at a 48-inch round, 8 at a 60-inch round and 10 at a 72-inch round. Divide your headcount by that number and round up to get the number of tables.
Can I make a seating chart on my phone?
Yes. On a touch screen, tap a guest’s name and then tap the table to seat them. You can still move tables by dragging their header. For a large event, a tablet or laptop gives you more room to see every table at once.
Can each table have a different number of seats?
Yes. Set the Seats box before you click + Add Table. Each table can have between 1 and 20 seats, so a long family table, a small kids’ table and a 2-seat sweetheart table can share one plan.
Is my seating chart saved? Can I share it?
It saves automatically in the browser you used, on that device, and nothing is sent to a server. To share it, print to PDF and send the file. To work on it from another computer, import the guest list there and seat it again.
How large an event can I plan this way?
The planning area has a fixed size. Six tables of six filled it comfortably on a laptop screen in our example, so very large events get crowded. For a big wedding or gala, plan the room in sections, such as the main floor and the terrace. Print each section, or use larger tables so there are fewer cards on screen.
Do I need an account or to pay?
No. The tool is free, there is no sign-up, and it runs entirely in your browser.
Make Your Seating Chart Now
Open the free Seating Chart Maker and import your guest list. Add tables sized for your venue, seat the anchors first and then fill in the rest. Before you print, take one walk around the room in 3D. Most events can be seated in one evening once the RSVPs are in.
Sources
- Joy — How to Create a Wedding Seating Chart: Step-by-Step Guide + Etiquette Rules
- Paperlust — How to Make a Wedding Seating Chart: A Step-by-Step Guide
- Party Rental Ltd — Table Sizes and Seating Guide
- WebstaurantStore — How Many People Fit at a Banquet Table?
- Learning and the Brain — Rows vs. Pods: What Seating Research Says (and Doesn’t Say), summarising Wannarka & Ruhl (2008), Support for Learning 23(2)